

In 2022 Amazon had over 130,000 brands registered with their brand registry program. But how does that affect your Amazon FBA business? Well, when you have brand registry you have the ability to create an Amazon storefront, which enables you to have enhanced opportunities to get more insights and data, enhanced advertising opportunities and create a mini-website for your brand, known as a storefront.
A storefront allows you to really showcase your products and track returning customers. When I started my storefront, my sales went up by over 10% the next month, and I now get between 5-10% of my sales from customers who search for my brand directly on Amazon.
In this guide we will go through how you can create an Amazon Storefront, the benefits of a storefront and the best practices for making a storefront that really stands out, so let’s dive straight in.
What is an Amazon Storefront?
The Amazon storefront is like a mini website that business owners can create to showcase your brand and products. The platform is very customizable which means you can show customers all of your product catalog, or you can create a selection of products. You can also customize it with branded imagery, which allows you to create more of a brand story. You can even use videos, which gives you a big advantage over regular Amazon sellers.
Essentially, the Amazon storefront gives you the ability to have a miniature version of your website on the Amazon platform. Creating a storefront is very easy as there are templates you can use, and the builder lets you drag and drop page elements into the site.
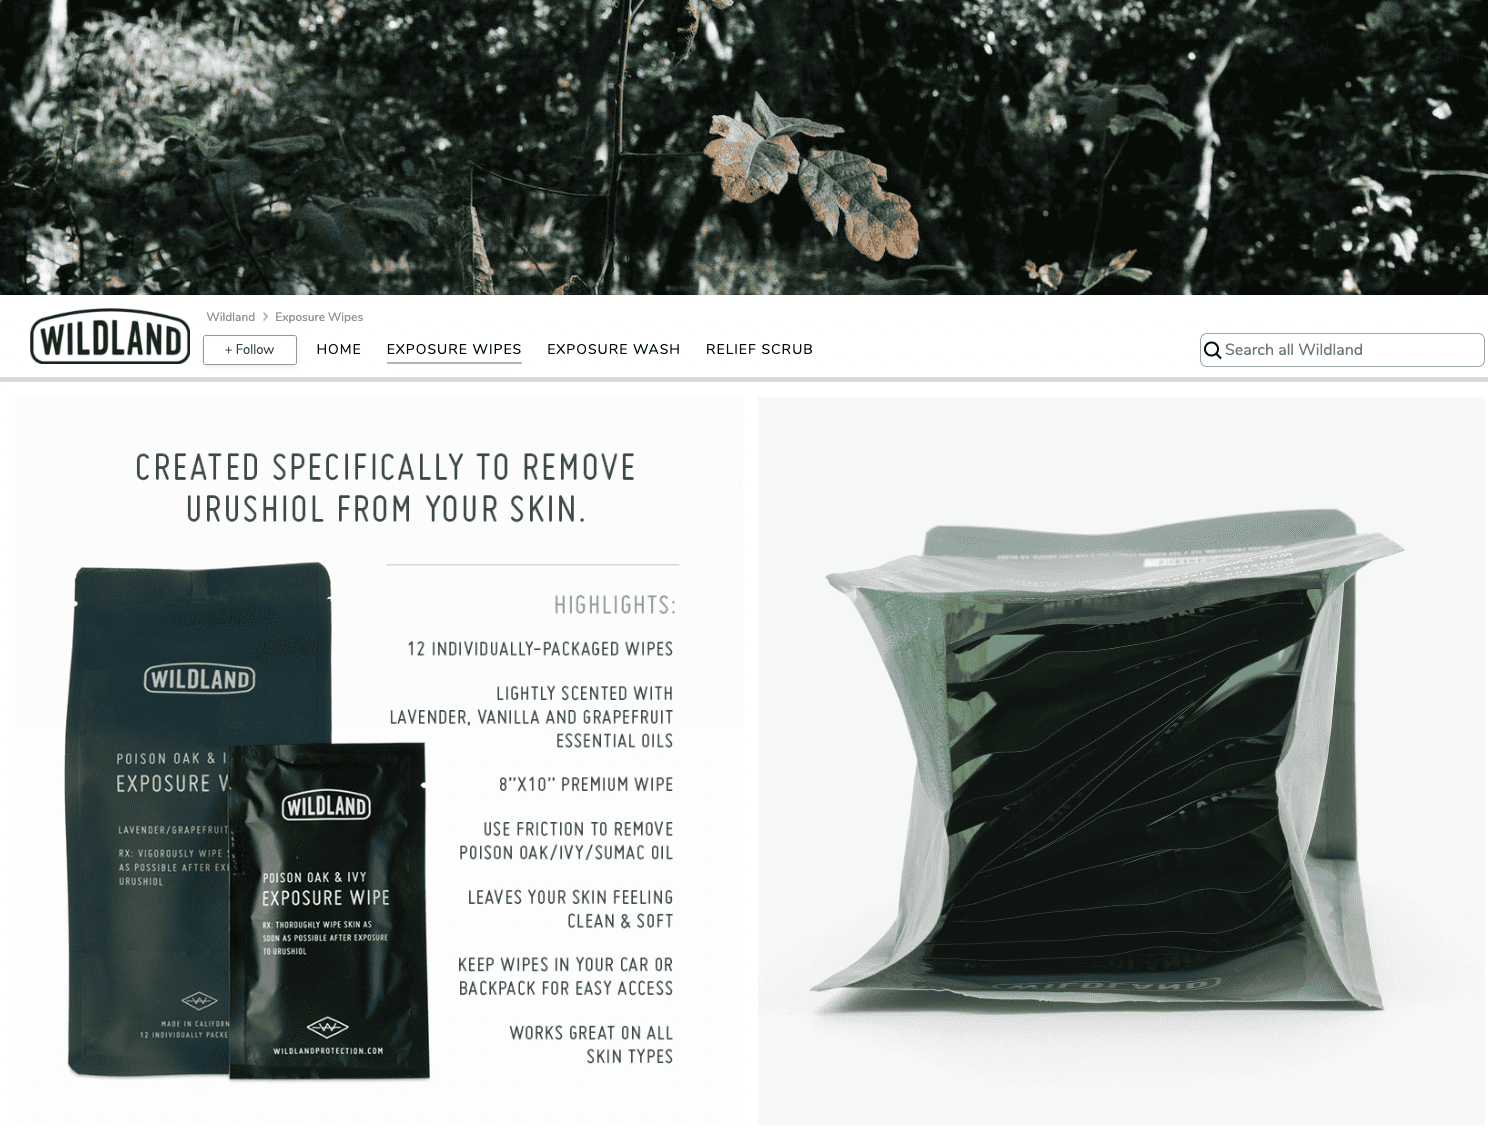
Below is a great example of a storefront from the brand Wildland. As you can see they use on-brand images to showcase their entire range of products, with branded images and videos.
Benefits of Setting Up an Amazon Storefront
If you are selling on Amazon already, you should definitely be thinking of creating an Amazon storefront, as there are lots of benefits and no real downsides, apart from the cost of getting a trademark when you get brand registered.
Amazon storefront benefits include:
- Increased conversion rate. Starting a store can increase your conversion rate by around 3-10% as customers have more trust in your brand, and can see much more information about your products. Amazon stores have videos and brand images that can help to convince customers that your products are better than the competition.
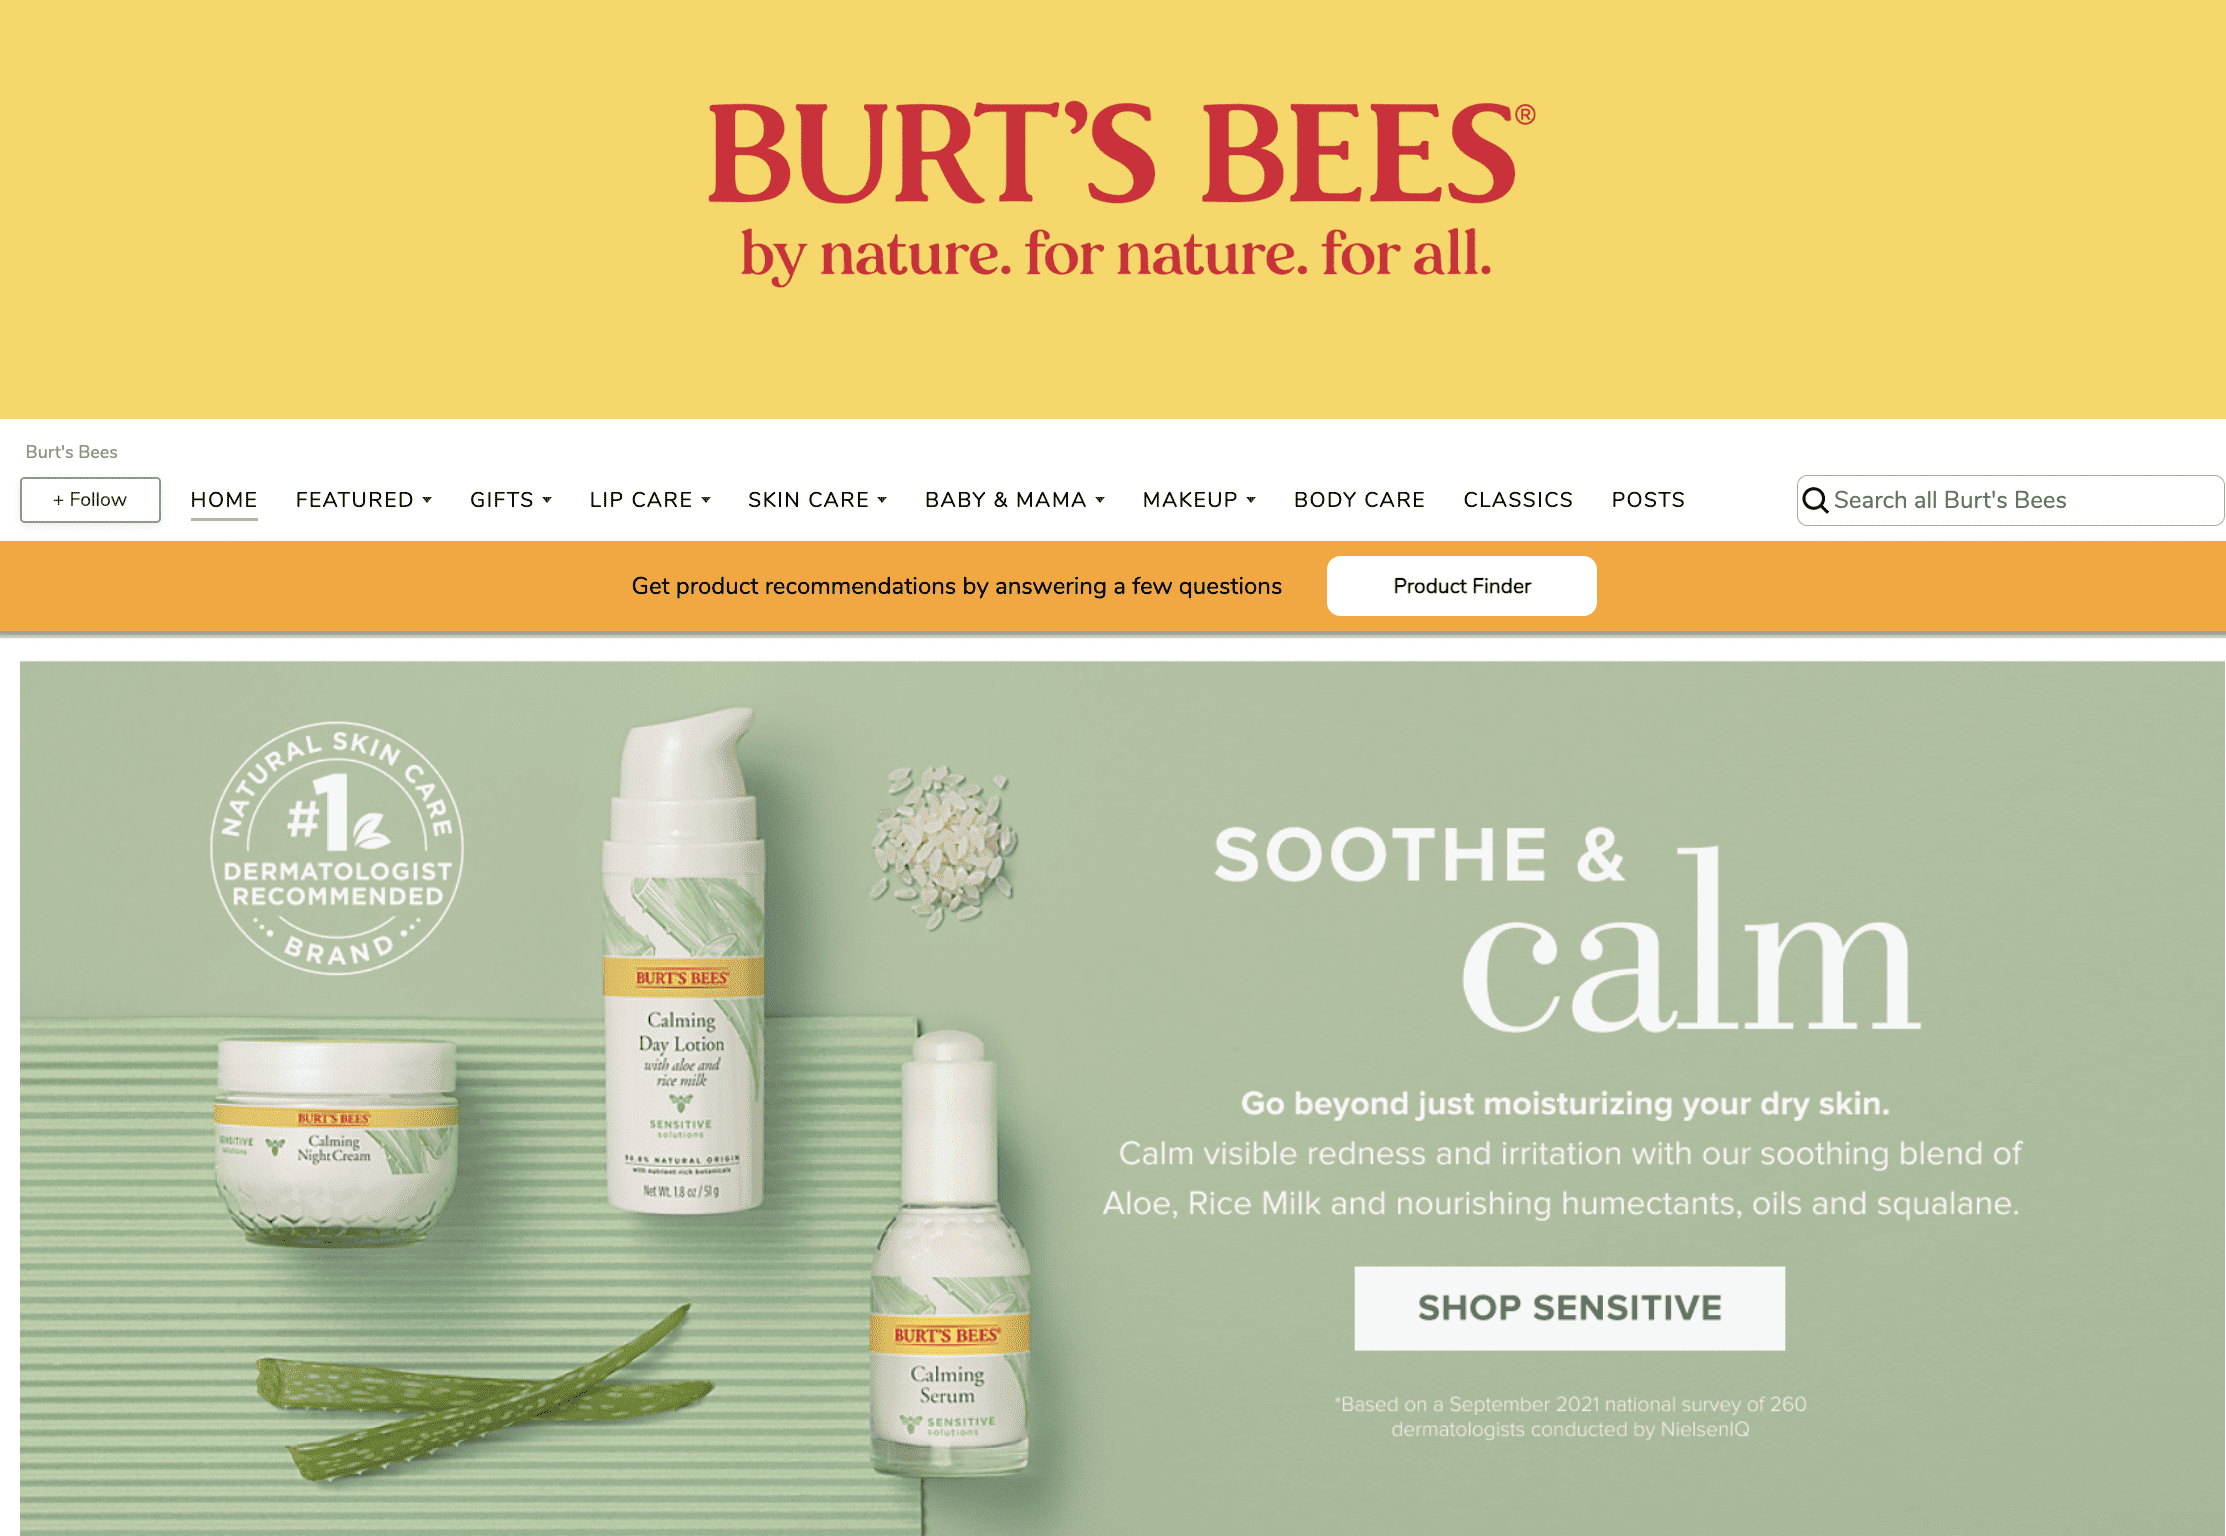
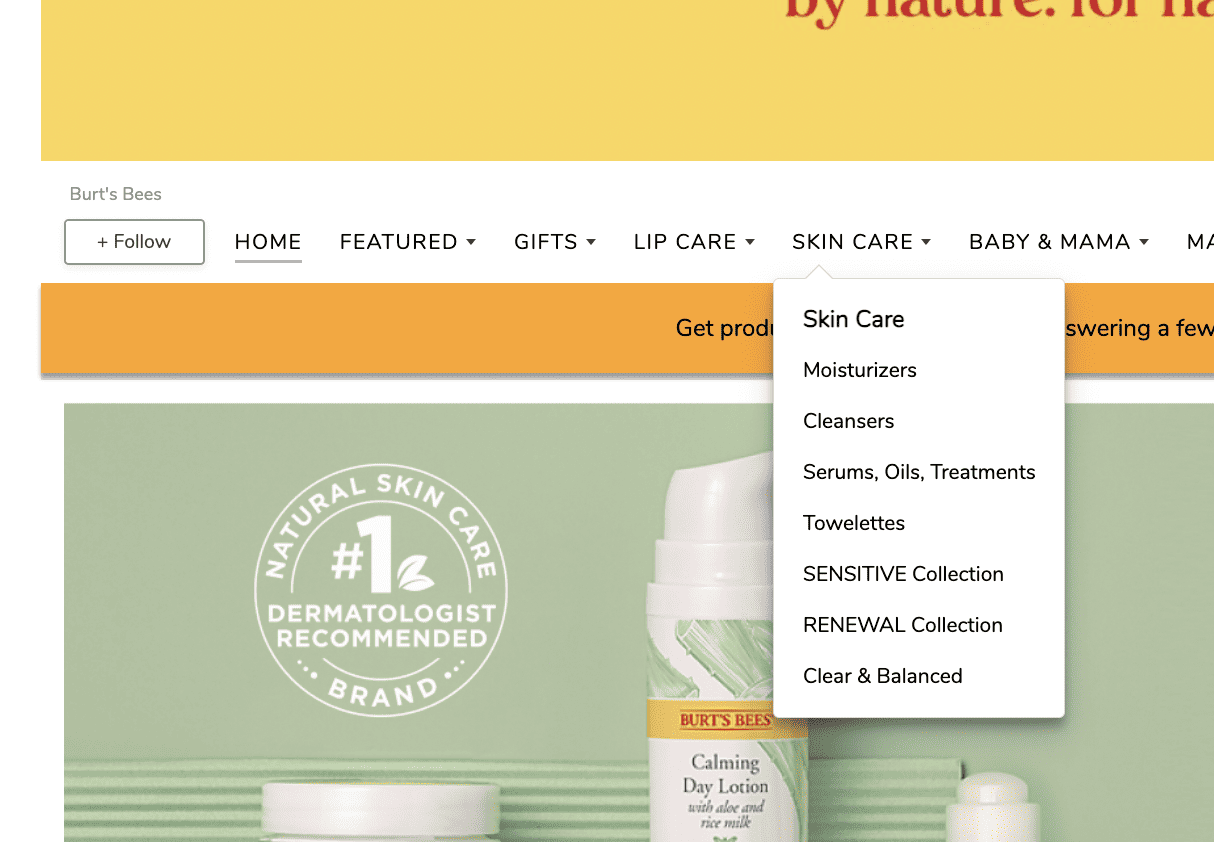
- Higher AOV (Average Order Value). A storefront is a great opportunity to tell customers about your other products or complementary products. You can also upsell customers onto other products, like Burts Bees do here.
- Build a loyal customer base. Customers are able to follow a store, which means they can get notifications when new products are released. This is another opportunity to build your brand.
- Build your online presence. You can drive organic traffic and external traffic to your store, as your store page will appear in Google searches. Amazon loves brands that have multiple traffic channels. Also, external traffic sources, such as social media or email marketing promotions and campaigns, can be directed to the storefront. This extra traffic can also help improve your organic rankings for your individual products.
- Track repeat customers. As a storefront owner, you can track returning customers, which is especially great if you have consumable products like moisturizer. When you come to sell your business, telling the buyer that you get return business is very enticing.
- No competitor ads. There are no ads shown on your brand page, which means you are less likely to lose sales to your competition. This is probably another reason why the conversion rate is higher.
What are the requirements to create an Amazon storefront?
Before you can create a storefront, you must first be brand registered (I go through that more in this guide). But as a summary, you first need to get a trademark from an eligible country. These countries are most of the ‘western’ countries in the world plus some of the other major economies. There is a full list of which countries’ trademarks are accepted here.
The trademark doesn’t need to be a US trademark, even if you are planning on selling there. I have a UK trademark for my brand, and I sell in both the US and UK. Brand registered sellers can then create the storefront.
How much is an Amazon Storefront?
The Amazon storefront is completely free, but you need to be brand-registered first. It is also free to become brand-registered, but you need a trademark to do that. Trademarks vary in price from country to country. My one in the UK cost around £300, and I got a trademark in just one class. It is a powerful tool that doesn’t cost too much!
How to make an Amazon Storefront
Assuming you are already brand-registered, creating an Amazon storefront is actually quite simple using the storefront builder. Before you get started, get all your images somewhere handy, as it will make uploading the pictures easy.
As we discussed, you can create images, infographics and videos. I created all my infographics in Canva, which is probably the best online tool I have ever used. It makes creating images super easy, and I am a really bad graphic designer.
If you don’t fancy making them yourself, then you could use a service such as Fiverr. I use Fiverr to create images and infographics all the time and it is often great value, but you need to make sure you are choosing people who do good work. Once you find someone good, make sure you remember them and keep using them!
Let’s look at the step-by-step guide to creating an Amazon Storefront.
Step 1 – Create your store.
First you can get to your store by going to the stores tab in the top left navigation bar, and clicking manage stores in the drop down menu. If you haven’t created a store before your page will say ‘Create Store’ and if you do have a store already, this is where your store will be displayed.
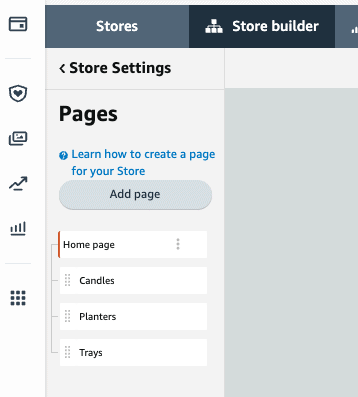
Step 2 – Decide on your store structure
Your store can have a number of pages, and I like to use them to show my different categories. For example, if you have a homeware store you can have your sub-categories as pages. In the example below, this homeware brand has set their pages as ‘Candles’ ‘Planters’ and ‘Trays’.
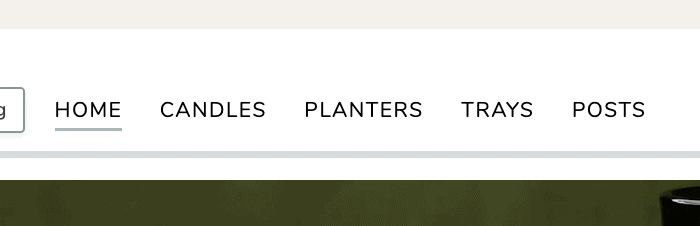
Once this is live, these pages will appear as clickable tabs that customers can use to navigate your storefront. This is what they will look like when you go live.
Step 3 – Create your homepage
The homepage is the most important page, as it is the one that customers will land on when they click onto your store. Customers will usually reach your store by clicking on the link to your brand name on a product listing.
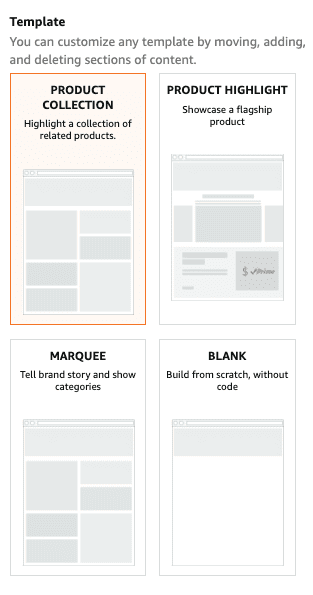
Amazon gives you two options to create your homepage, you can use a template, or create it from scratch. If you are new, I would definitely recommend using a template, as you can edit it, and it gives you an idea for what sort of content you can make in Canva. My design team uses Canva and it is such a good tool and it is great value. I use it for creating all my design work.
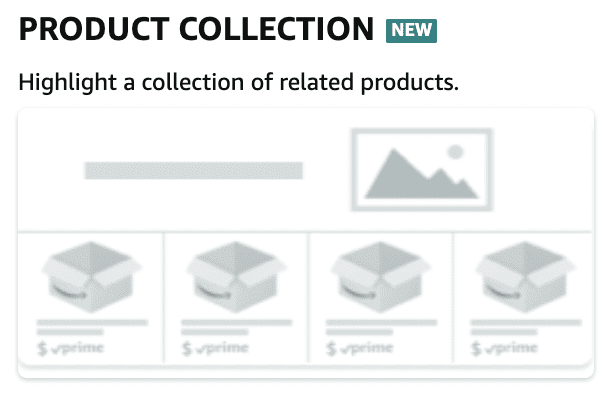
There are 3 templates you can use called ‘Product Collection’, ‘Product Highlight’ and ‘Marquee’, and each one has a slightly different layout, which will suit different kinds of products. There is also a blank design, if you want to do it from scratch.
When you create the homepage, you can also add a meta description, which will give the search engines an idea of what your store is about. In this section I like to include my main product keywords, e.g. if you sell football boots, put the word football boots in here. You should also make it read nicely, as this text is what will be shown to customers in Google searches.
Your homepage should really show off your brand to potential customers, giving them an idea for what your brand is about and showing them beautiful images and infographics of your products. I have some of my favorite examples in the next section.
Step 4 – Build your other pages
Your other pages use the same layout options as the home page. You can pick from one of the templates or build from scratch. Again, I recommend using the templates and then editing them to your needs. If you create a multi page store front then Amazon automatically creates a navigation menu for sub pages.
Within the subpages, you can also categorize your products so they can appear as a little drop down. For example, if you sell electrical kitchen gadgets you could have a page for ‘Food Processors’ and then the sub categories could be ’20l Blenders’, ‘Hand Blenders’ and ‘Spice Grinders’
How to setup an Amazon storefront
When you are setting up your Amazon storefront pages, you can choose different types of modules or content tiles to make up the page.
Storefront Header
The first module you can edit is the Header. This section is sometimes called the hero image, but Amazon’s terminology is the header. This section gives you a great chance to showcase your products and brand. The best use of the header is to give the customers a really good idea about what your brand is all about. It is a bit like a custom landing page for your brand.
This is what the Header selector looks like:
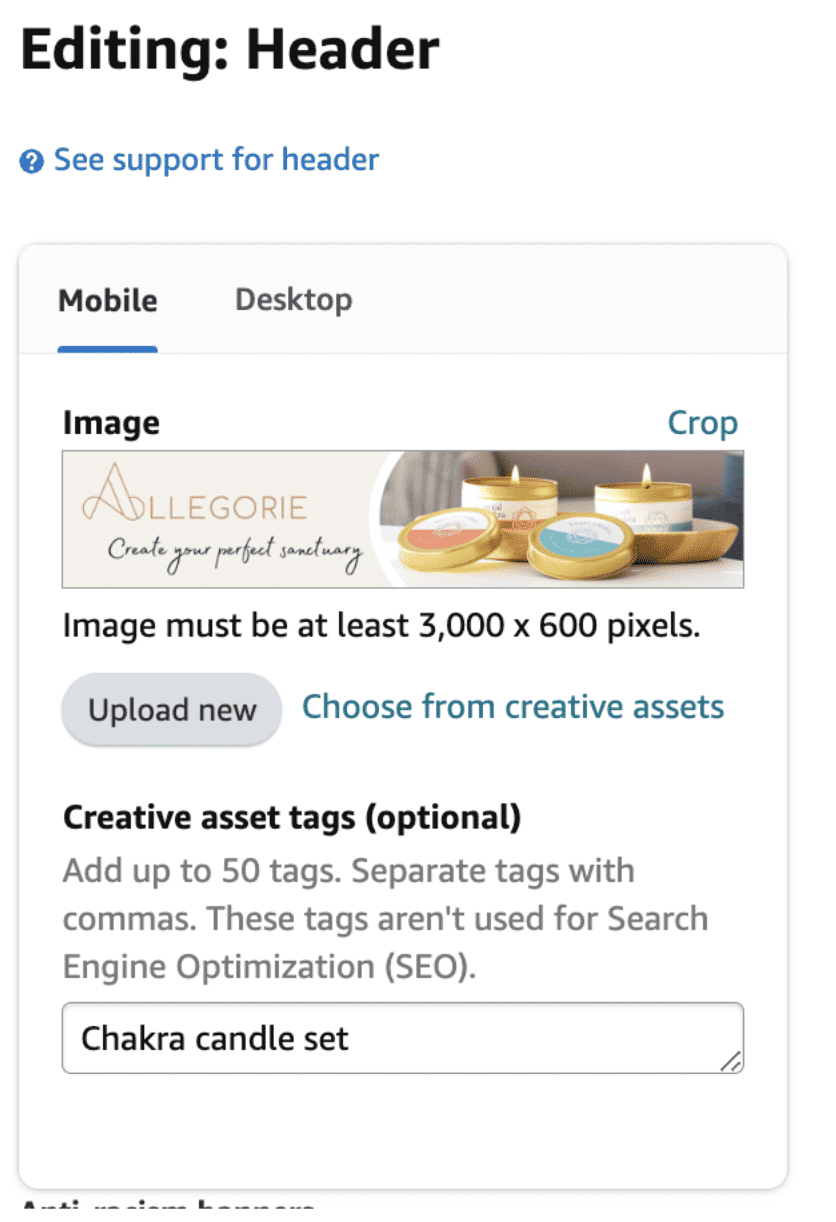
The header image will be automatically resized for mobile, but you can upload a mobile version of the header if you want to use something more specific. If you are going to use a lifestyle image, then Amazon’s rules state that you should make sure that one of your products is included in the image if possible.
The header will appear on all your pages, and you can’t change how it looks for different pages. The header is your most important section, so if you need to use Canva or Fiverr to help with this module, then that would be a good investment.
Use a high quality image for this tile slot, as it will be viewed the most by customers.
Other Storefront Modules
Once you have created your header, you can create your other storefront pages. If you use a template, your page will automatically be created for you, and some of the sections will be automatically populated.
There are 14 modules you can choose from to showcase your products, and some of them autopopulate and some of them you need to add some more information before you go live.
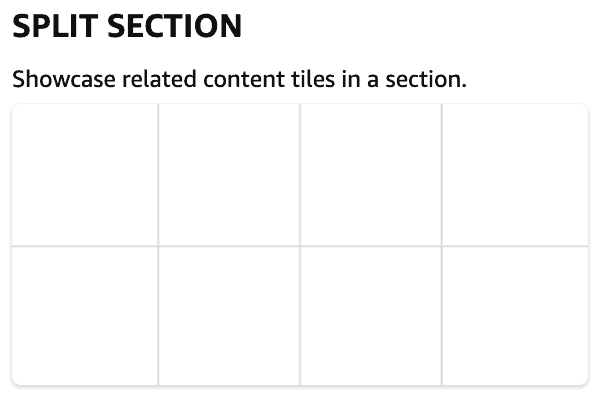
Split Section
This section has lots of different options so you can change its layout and the number of images inside. This is one of the most important modules as you can choose different sized images to suit your brand. you can choose the collection of products you display, or you can show your entire product catalog. It could also be used to show a specific product portfolio that you want to highlight.
The split section module will automatically resize itself so it looks good in different screen sizes including mobile devices. The storefront is designed to give a good mobile experience on the mobile app and on the browser.
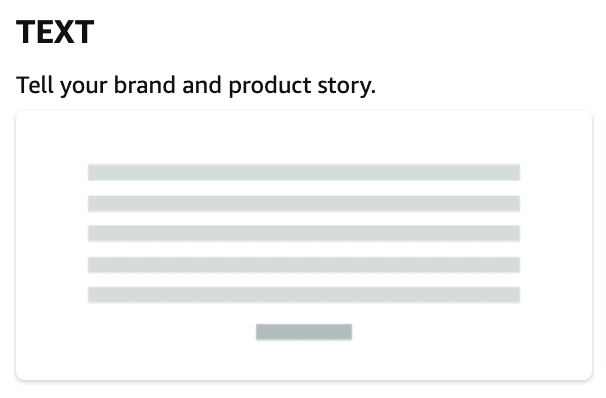
Text Section
The text section is a place for you to give some information about your brand or some product details. This is a great opportunity for you to sell your brand to potential customers and tell them what makes you special. If you use interesting materials, donate to charity, are made in the USA, or anything else that makes your brand stand out, then this is the place to tell your customers. I like to use this section to give good product descriptions or even product comparisons.
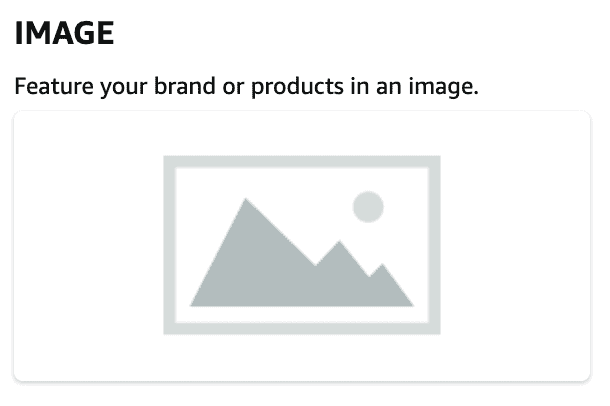
Image, Image with Text and Shoppable Image Sections
These sections are where you can show some lifestyle images of your brand. A lifestyle image is a picture of your products in action, and they are really useful for getting your customers to visualize themselves owning the products. You could show a picture of your customer wearing or using the product, or show the products on a nice background with the ingredients. If you sell multiple products you could use this section to show all of them together, which might encourage multiple purchases.
The shippable image is a really nice one to use, as customers can click on the image and be taken to the product listing. This is a really nice way to get customers to buy products without being distracted!
I love using the shoppable image section for new product launches that I want to highlight to the customers. You can only show a single product in this section, but you can have multiple shoppable images. Another benefit is the image shows the customer reviews, which gives buyers confidence that the product is good.
Product, Product Grid and Product Selections
These sections are best for showing your best products, and giving them the limelight. There are lots of different settings inside these modules that can help you make sure you’re showing your best products to the customers. For example, if you make a product selection, you can set it so that out of stock products aren’t shown. You can also let Amazon choose which product to put in the box based on their knowledge of the customers. This is a really powerful section as it shows all your products together.
Best selling and Recommended Products
The best selling and recommended products sections are automatically populated when you add the modules in, so you don’t need to worry about what products go in here. The recommended products is a good one to use, because Amazon decides which products to show to the customer based on things like the reviews and the customer’s buying habits.
Step 5: Submit your Storefront for review
Once you are done building out your new Amazon Storefront, the last step is to click “Submit for publishing.” Once submitted, Amazon will review your Store within 24 hours. Once it’s approved, be published for customers to see on Amazon.
Below is the final design of the Jungle Stix Amazon Store. I added plenty of lifestyle images so customers know how to use the product and product listing thumbnail for easy purchasing. I also added a split tile to let customers know — with a video and text — that the proceeds from Jungle Stix sales go to charity.
Examples of great Amazon Storefronts
Now, we have been through how to actually create a storefront, but what is important is making your storefront look great so that customers buy from you. Here are some of my absolute favorite storefronts:
https://www.amazon.com/stores/Wildland/
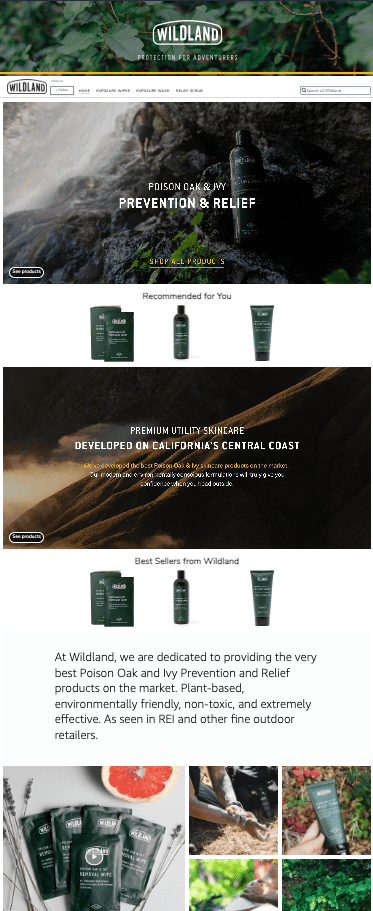
What I love about this store is they use really amazing original images. Their pictures are really on brand and show off their brand really nicely.
They have also shown some good pictures of people using the products, so as a customer you can really visualize yourself using the products.
The brand has a small range, so they maybe don’t need to have best sellers and recommended for you, but the products still look great, and as a customer I would want to buy this product.
https://amazon.com/stores/Allegorie/
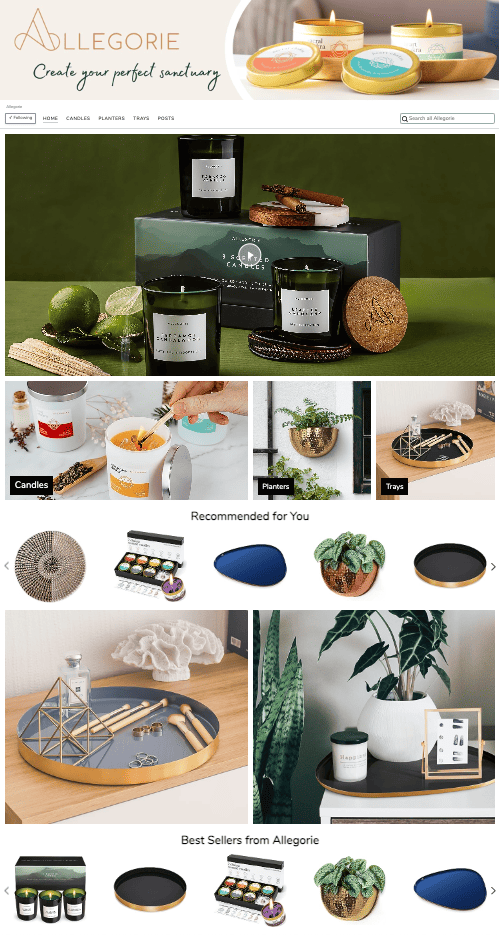
Allegorie has focussed more on showing off their really nice product images here. Their products are all quite pretty, so the focus on showing nice scenes from the home works really well.
They have also shown their best selling products, which works nicely as they have a larger range of products.
They have also included a rand video, showing how to use some of the candles. This is a really good way to show off your products as videos convert really well.
https://www.amazon.com/stores/LORELEI
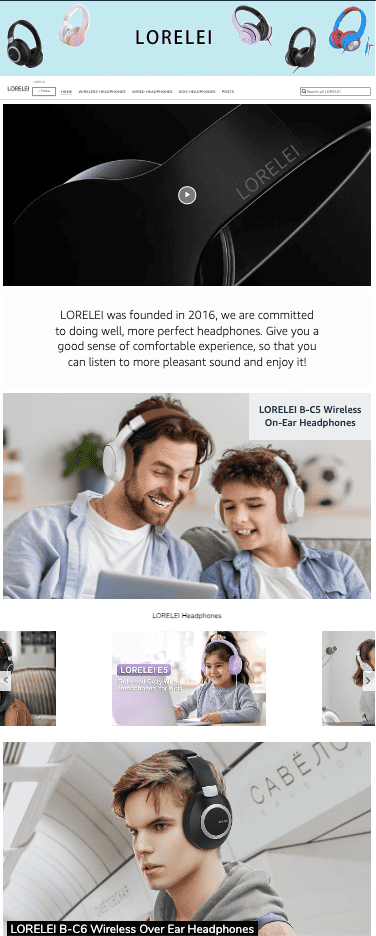
Lorelei is a bigger brand that sells headphones for younger kids and families, and their images show exactly that. They have used big images and videos to display their pictures, and it is clear straight away what their brand is about.
How to create an Amazing Amazon Storefront
Now you know what a good store front looks like, and what you need to do to create your Amazon storefront, you need to know how you can make an amazing Amazon storefront for your ecommerce brand. These are the steps I go through when I am talking to clients to help them make their Amazon store.
Competitor Research
Before jumping headfirst into creating your storefront, you should make sure you are doing really thorough research on what your competitors are doing. The best way to do this is to search for the keywords you want to target, and when you’re on the page use Helium 10 to work out which of your competitors is selling the most products. If they’re selling the most, they must be doing something right, right?
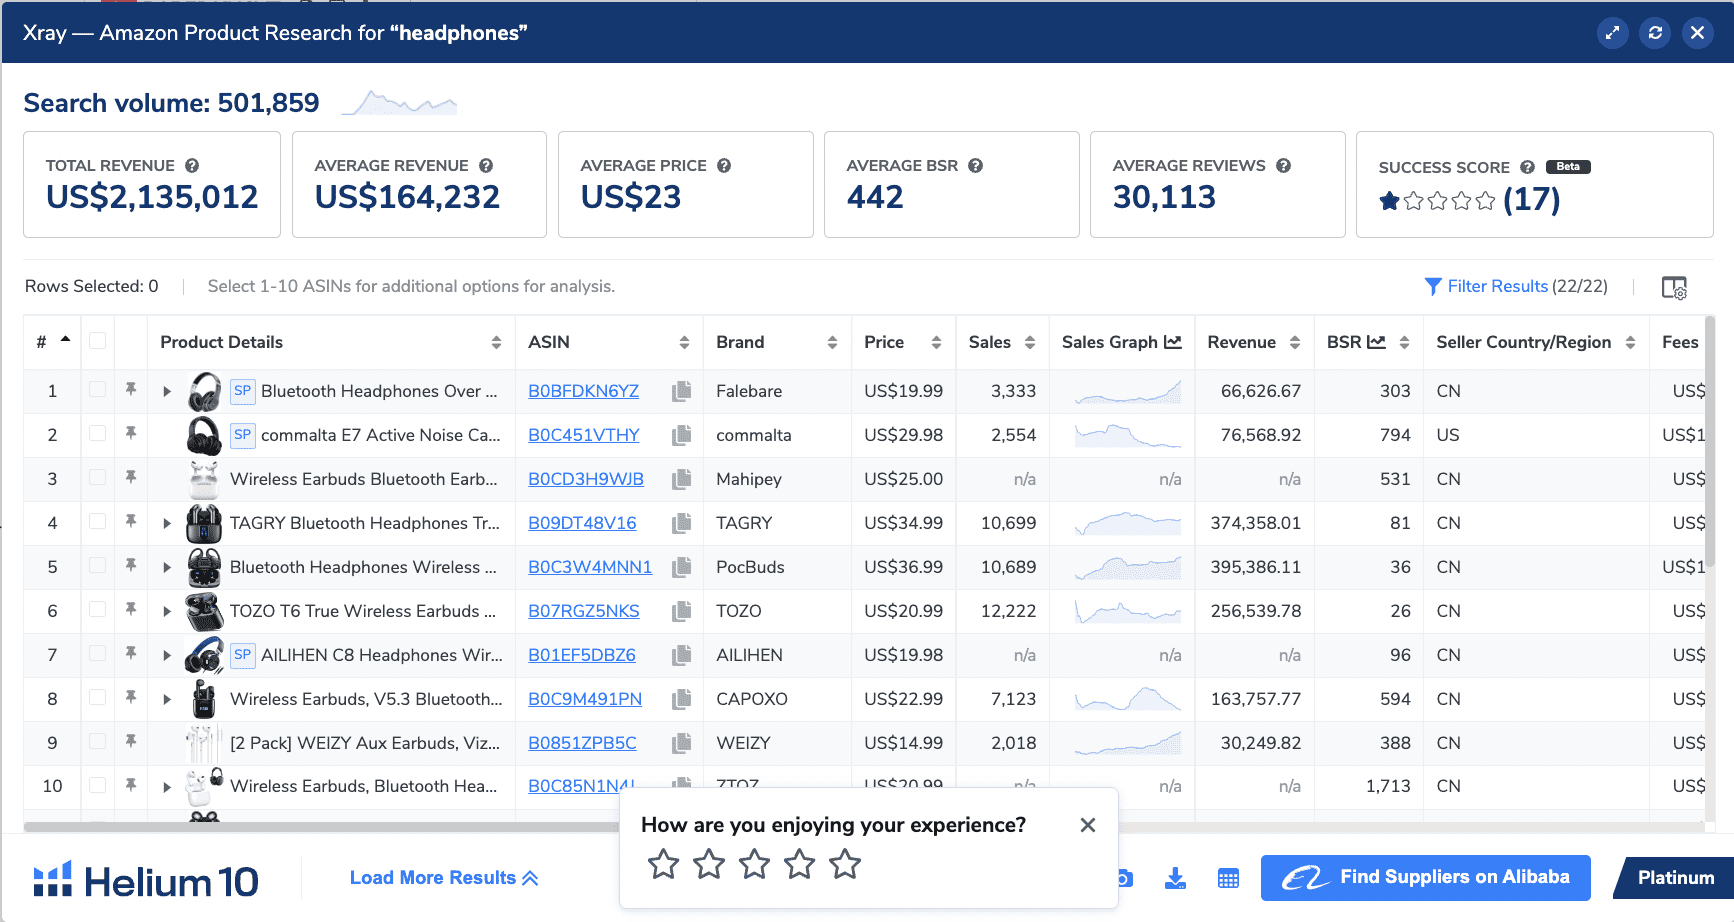
Helium 10 is such a good tool and I use it every day in my business. As you can see here you can get some amazing data about how much revenue your competition is making per month. Here is a cheeky discount code for using Helium 10. Best decision I have ever made in my business.
Once you have done that, go into their storefront to see what it looks like. Of course, you don’t want to copy what they are doing, but getting inspiration from your competitors, especially if they’re doing well is a great place to start. Remember what Will Smith said: “Emulate then innovate”, before slapping Chris Rock.
Understand Your Target Audience
As I showed with the Lorelei storefront, once you understand your target audience, you can choose what sort of storefront to have. If you sell products aimed at parents, make sure you use images of parents using the products with your kids. Whereas if you sell pretty homeware products, you want to show images and videos of a nice, calm and fashionable home.
If you sell fitness products, the images are going to be different again, with the storefront more aimed at fitness fans. Technical products might need infographics to explain some of the technical specs.
Think about who your customers are, and create a storefront that sells the benefits of your products.
Identify Your Product Categories and Range of Products
Once you have thought about your target audience, you should think about your products, and what sort of storefront modules will show them in the best light. As I mentioned, technical products could have some infographics to show the benefits, or even a video to show a customer using a product. If you have a range of best sellers and you want to highlight these, then a best-seller module would work well.
Some products need more words to explain how they work, whereas some just need images. think about who your target market is and how they usually shop. It’s a good idea to look at your biggest selling competition using Helium 10, so you can get an idea for what the competition is doing. If they’re selling a lot, they could be worth getting inspiration from.
Amazon Storefront Meta descriptions
Amazon allows you to add a meta description to your store front. This section allows you to give an SEO friendly description of your store, which will show up in search engines when customers search for relevant keywords or search terms. This is what the meta description looks like in google:
When you are making your meta description, make sure you use your brand name as this will help you to appear at the top of searches. You should also give a good description of your business and what products you sell. This part is important as you want prospective clients to be intrigued enough to click on your store.
You only have 170 characters to use for your meta description, which is less than a tweet, so keep it snappy and to the point.
Design a Product Grid Style that Suits Your Brand
The layout of your storefront is important as you need to create a layout that is visually appealing for your target audience. Amazon uses an Amazon product grid format to arrange all the product tiles in your storefront. There are two things you need to think about, the grid pattern and the designs for the individual product tiles.
When choosing a grid pattern, think about what sort of information you need to tell your customers. Some products will need more text explanation, but others will be fine with just images.
When designing the sections, I like to use Canva to create blocks that match my own website design. I use the same fonts and colors so that I have a cohesive experience for customers. This is more likely to start building brand recognition for you.
Some brands also include values that are important to them, or any certification that the customers might like to see. For example, if your brand identifies well with the LGBT community, you might want to include some LGBT focussed imagery or wording. If your products are recycled or use sustainable wood, you could include those badges in your images. You have probably seen businesses that tell their customers they are a certified B-Corp, and you can include this sort of messaging in your module images.
The most important thing is you create images that are really on brand and make customers want to buy the products.
Amazon Posts
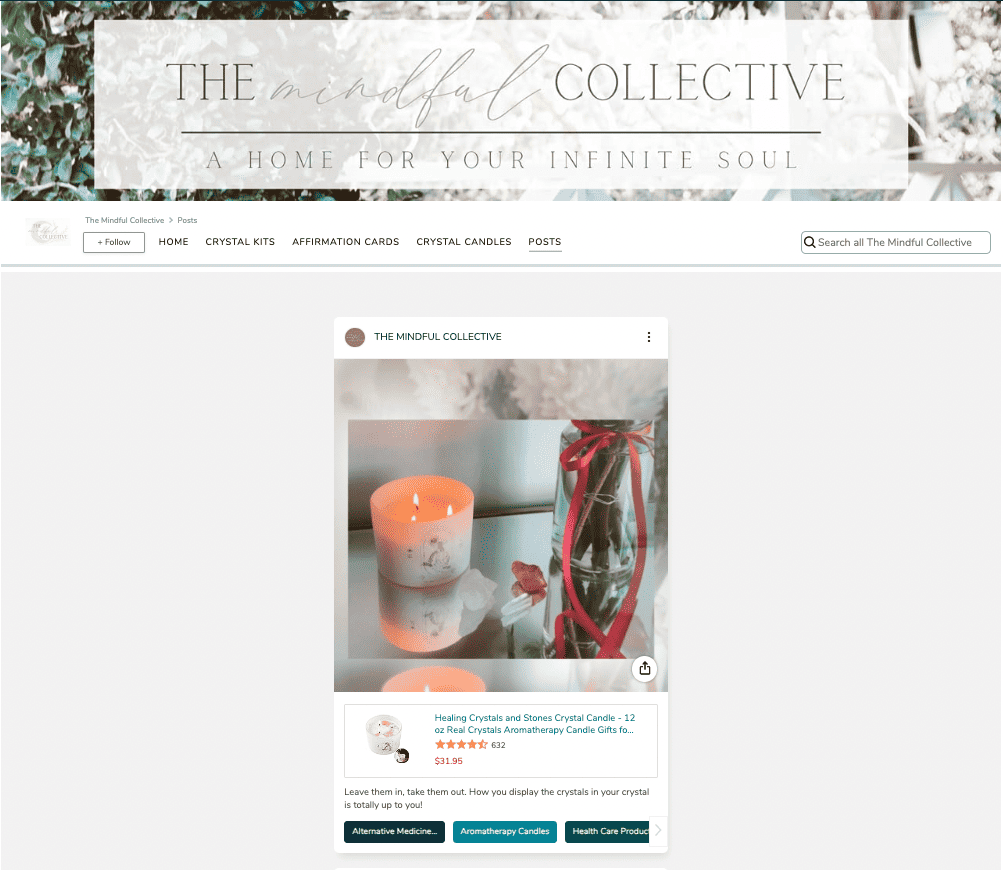
This is a relatively new part of Amazon, but Amazon Posts is basically like a shoppable Instagram style feed for Amazon customers. If you are brand registered and have a store front, then you can create posts which are like Instagram posts and they will be shown to your customers. The images can link to product pages and they will be updated in real time with any deals or price changes you make. Here is a great example of how posts can look for your brand by the Mindful Collective:
This is a great section to use if you are already a content creator, as you can repurpose Instagram posts.
Publishing Your Amazon Storefront
Once you have everything ready, you are ready to publish your Amazon store front in seller central. Once you click publish, the storefront goes to review. Amazon physically reviews each Amazon store front with a human, so they will look at images to make sure you aren’t using any banned words or unrealistic claims. However, once it has been reviewed it will be published and it will go live! Let the fun begin.
You can edit your storefront any time, so even once it is published you can go back and make changes.
Obtain Approval from the Amazon Brand Registry
Before you are allowed to make a store front you need to get Amazon brand registry. Brand registry also allows you to make A+ content for your products, which should help conversion. Here is how you get Amazon brand registry:
- Visit the Amazon Brand Registry website and click on the “Enroll now” button.
- Sign in to your Amazon Seller Central professional seller account or create one if you haven’t already.
- Enter your brand’s name and select the relevant product categories.
- Provide your brand’s government-registered trademark number.
- Specify the jurisdictions where your trademark is registered for the selected product categories.
- Upload images of your product packaging, a product with the branding visible, and any additional information requested by Amazon.
- Submit your application for brand registration.
The trademark doesn’t need to be from the country you’re registering in. For example, I am based in the UK and have a UK trademark, but I sell and have brand registry in the USA. The approval process is usually quite quick, and you should hear back in about a week. You need to have a professional selling account in order to register.